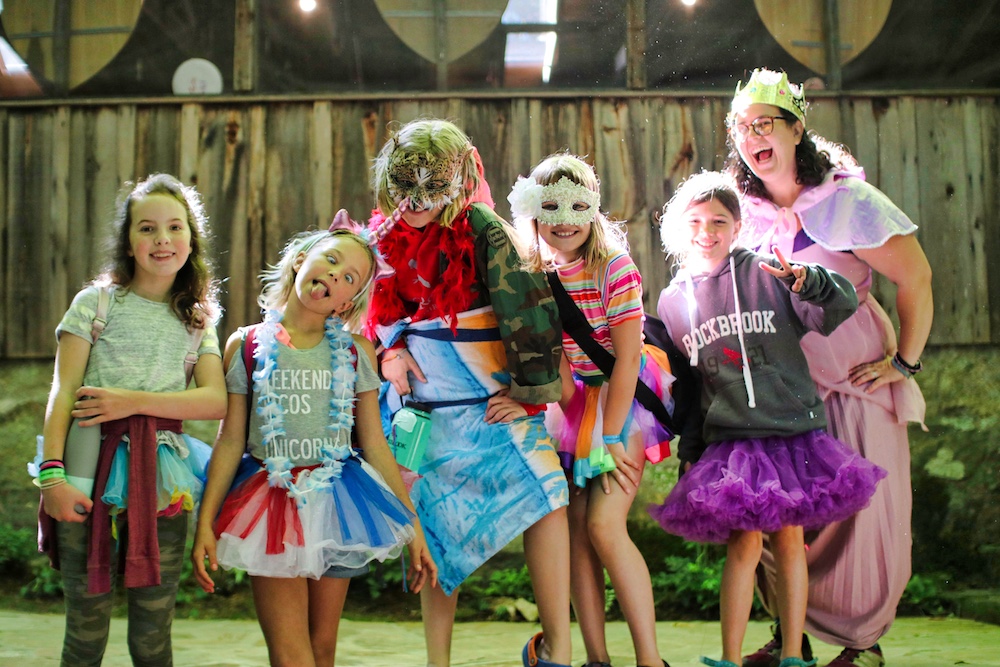
Sometimes when you go hiking, the aim is not to cover a great distance, or to reach a particular destination. Instead of a goal, it’s a stroll. Instead of striving forward, some hikes are deliberately slow because what’s on the side of the trail is more interesting. Rockbrook is well known (among those who have looked) to be brimming with subtle points of beauty, magical areas of the forest that stand out as special… a clump of moss with the smallest fern poking through, the gnarly bark of a massive pine tree, or a snail silently sliding along a leaf, for example. With just a little imagination, it’s easy to understand all this beauty as the work of nature spirits, or fairies. It’s part of our camp lore; Rockbrook is a “fairyland of beauty,” as one camp song puts it. We live among fairies enlivening our experience of nature. They are rarely seen themselves, but if you look carefully, you can see evidence of them everywhere. Today a group of Juniors took a short hike looking for just such evidence, and to make it even more fun they decided to dress as fairies too. Exploring along the path to Rockbrook Falls, they found fairy houses, fairy gardens, and even fairy playgrounds, as shiny stones, delicate flowers, and colorful lichens proved the Rockbrook Fairies lived nearby. These girls learned that there are wonders everywhere… If we just slow down, look to the side, and pay attention.
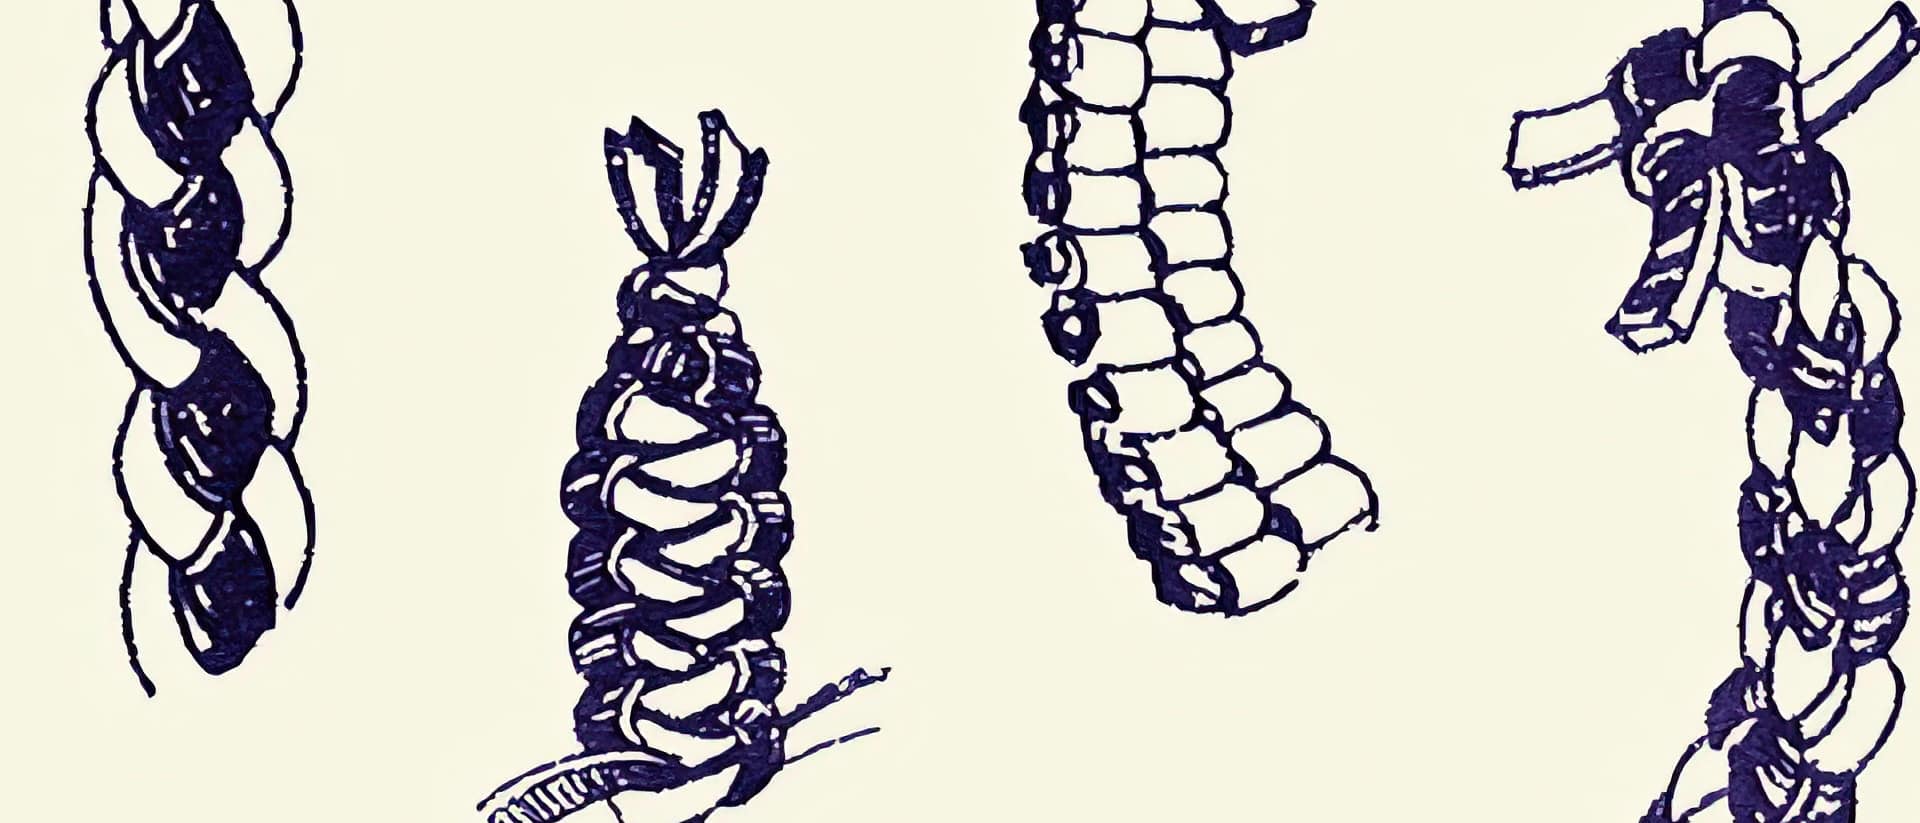
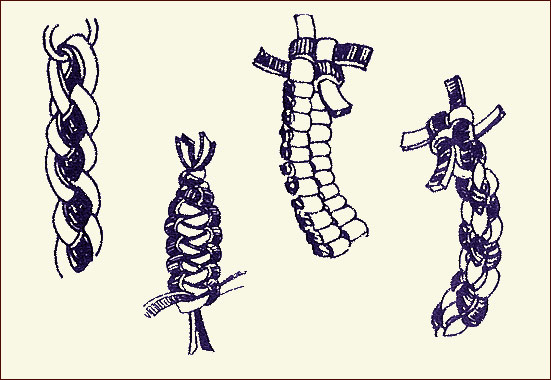
Teaching the Friendship Knot
Our oldest campers (10th graders), the Hi-Ups, helped teach the younger girls another piece of Rockbrook lore today— how to tie the special “Friendship knot” on the red neckerchief of our camp uniforms. We wear our uniforms only on Sunday mornings and a couple of special events, but the red tie, ideally tied with this knot, is a crucial addition to the white shirt and shorts. The Friendship Knot is also called the “Chinese Square Knot,” “Cross Knot,” and “Rustler’s Knot.” When tied properly it has a distinctive square pattern on one side, and cross on the other, akin to the Chinese ideogram for the number ten. It’s not difficult to tie, but like most knots, the best way to learn it is to have someone demonstrate the twists and turns of the pattern. So today Sarah first taught all the Hi-Ups, and once they mastered the technique, they fanned out across the camp to teach the other campers. Friends helping friends tie Friendship knots. Pretty cool!
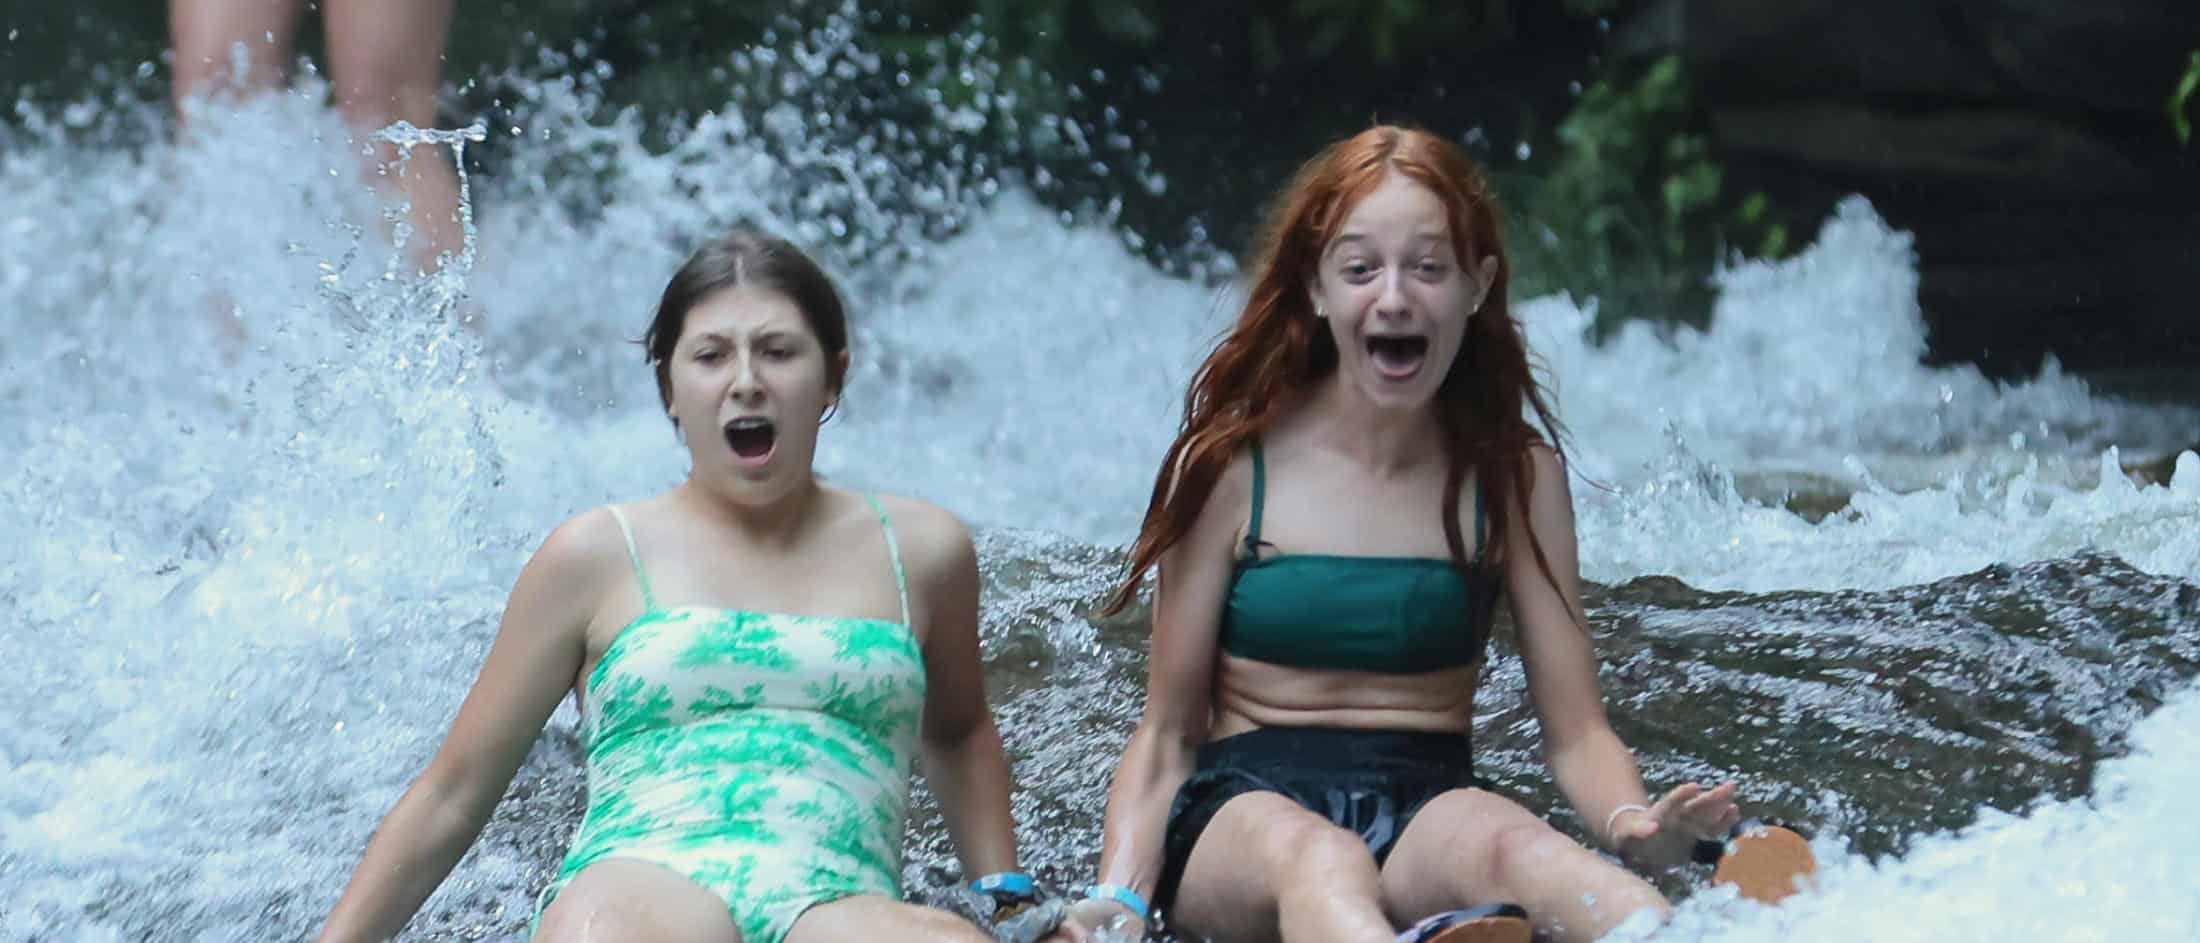
Sliding Rock in High Water
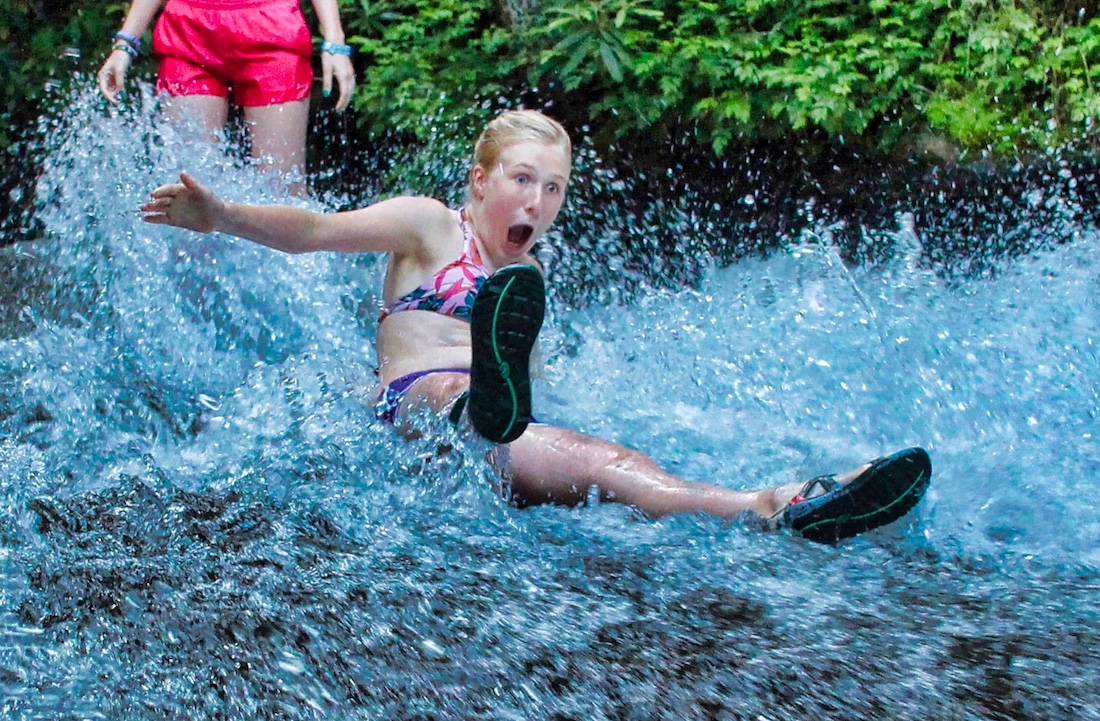
A trip to Sliding Rock is always exciting— freezing cold water cascading down about 60 feet of sloping rock into a deep pool below, and camp girls taking turns sitting in the water for a thrilling ride and plunge —but tonight when we took all the Seniors, it was even more so. The recent record rains in our area have completely saturated the ground, and even after three days of completely dry weather, we are still seeing higher water levels in the streams and creeks. Looking Glass Creek begins high near the Blue Ridge Parkway and when it reached Sliding Rock tonight it had had a chance to build quite a bit. With our lifeguards waiting at the bottom, rescue tubes ready, the girls had a great time sliding in the faster water as it pushed on their backs down the rock. It was loud, extra-splashy, cold as ever, and more adventurous than usual. While not every Senior braved the ride, some slid four or five times, and probably would have kept sliding if we had had more time.
Sweet Treat at Dolly's
We topped off the trip with a quick stop at Dolly’s Dairy Bar for a frozen sweet treat. Everyone enjoys a trip to Dolly’s. With all their special camp combination flavors (“Rockbrook Chocolate Illusion,” for example), plus standards like “Cookie Dough,” there’s something everyone likes. It didn’t take long for the sugar to kick in and the girls to warm up for the camp songs to burst out. It’s quite something to see when about 85 teenage girls start singing at the top of their lungs. The word “powerful” comes to mind. “Impressive” and “joyous” too. With this kind of great Rockbrook girls, this much fun simply turns out that way!